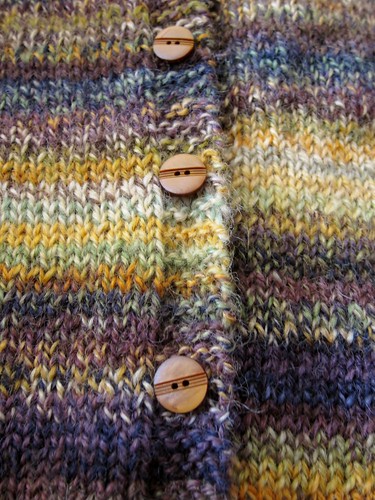
When I finally finished knitting my handspun Garter Yoke Cardi, it took me a little while to find the right buttons. Which meant I had a lot of time to think about how the buttons were going to go on, and how I wanted the final sweater to look.
I'd read that putting a ribbon backing on a handknit button band was a good idea for a few reasons: 1) it stabilizes the band and keeps it from stretching with the weight of the buttons, and 2) it gives you a solid surface to sew the buttons to. Somehow, I'd never managed to actually do a ribbon backing, but this time around I was in a finicky kind of mood, I guess, so I picked up some ribbon along with my perfect buttons.
I hunted around online for a good photo tutorial, but didn't come across one. I did find a good (if long) video from Jasmine and Gigi of the Knitmore Girls podcast, so I watched some of that and then winged the rest of it.
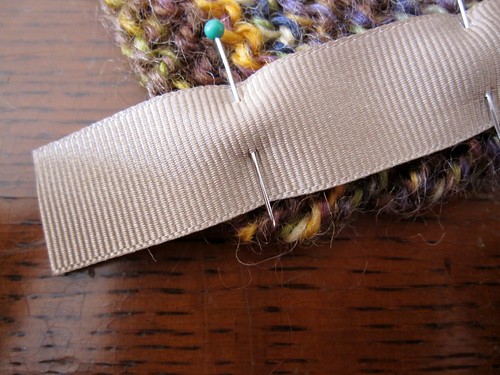
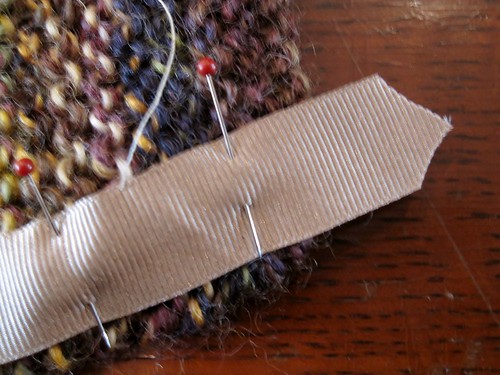
Step 1: cut the ribbon to length and pin. I laid out the sweater and cut the ribbon so that it was about an inch longer then the buttonband on either end.
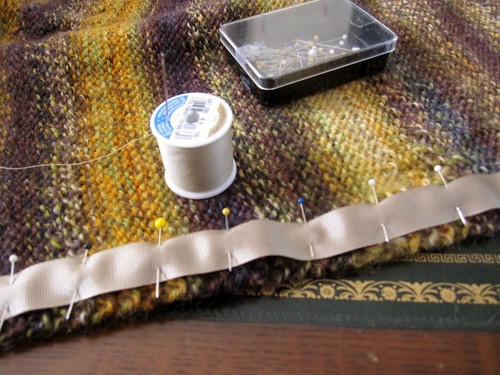
Step 2: the Pinning.
Then I pinned it using waaaay more pins then most people would consider necessary.
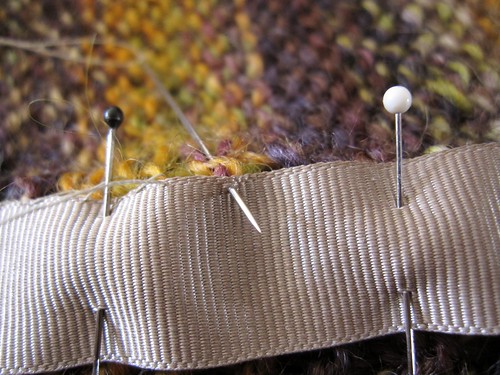
Step 3: Sew. Pretty self evident. I'm sure my stitches are way too big for Gigi, but so be it...;-)
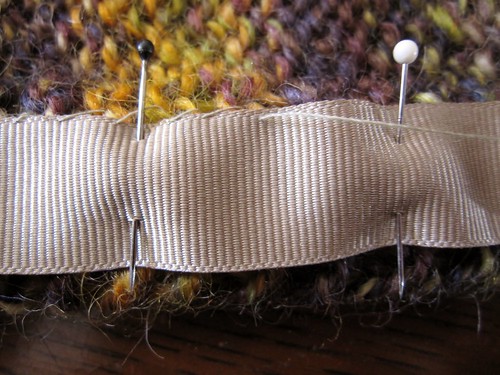
Step 4: Deal with extra ribbon at ends of buttonband. I have to admit, I stopped watching the video after Gigi started sewing, so I don't know how they dealt with the extra ribbon. My quick and dirty method was to trim the ribbon end into a point,
fold it under,
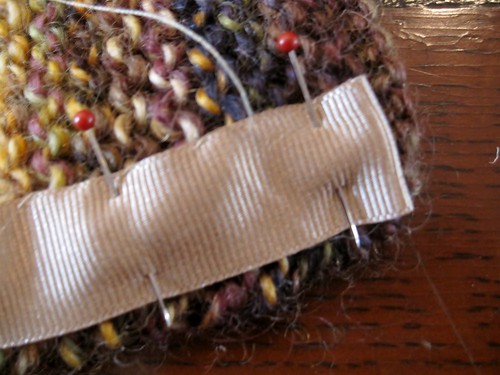
and continue sewing as established around the end of the band and back down the other edge. Repeat at far end, finish off, tie knot, trim thread and voila!

Finished buttonband ready for buttons.
I have no data yet to report on whether or not this is a more effective button band treatment in terms of stretching, given that it is not yet Romney sweater weather here in the UK. It certainly feels more stable then a non-backed button band. Give me a month and I should be able to discuss whether or not the extra couple hours* worth of finishing was worth it. It was definitely easier to sew the buttons on since I didn't have to worry about the end of the thread pulling through or the stitches getting all distorted.
So there you have it. I hope this is helpful, and that everyone gets inspired to back their button bands! You know, if you've got the extra time to spare...
* To be fair, that time includes going out and getting the buttons. I'm not that slow a sewer!
I'd read that putting a ribbon backing on a handknit button band was a good idea for a few reasons: 1) it stabilizes the band and keeps it from stretching with the weight of the buttons, and 2) it gives you a solid surface to sew the buttons to. Somehow, I'd never managed to actually do a ribbon backing, but this time around I was in a finicky kind of mood, I guess, so I picked up some ribbon along with my perfect buttons.
I hunted around online for a good photo tutorial, but didn't come across one. I did find a good (if long) video from Jasmine and Gigi of the Knitmore Girls podcast, so I watched some of that and then winged the rest of it.
Step 1: cut the ribbon to length and pin. I laid out the sweater and cut the ribbon so that it was about an inch longer then the buttonband on either end.
Step 2: the Pinning.
Then I pinned it using waaaay more pins then most people would consider necessary.
Step 3: Sew. Pretty self evident. I'm sure my stitches are way too big for Gigi, but so be it...;-)
Step 4: Deal with extra ribbon at ends of buttonband. I have to admit, I stopped watching the video after Gigi started sewing, so I don't know how they dealt with the extra ribbon. My quick and dirty method was to trim the ribbon end into a point,
fold it under,
and continue sewing as established around the end of the band and back down the other edge. Repeat at far end, finish off, tie knot, trim thread and voila!
Finished buttonband ready for buttons.
I have no data yet to report on whether or not this is a more effective button band treatment in terms of stretching, given that it is not yet Romney sweater weather here in the UK. It certainly feels more stable then a non-backed button band. Give me a month and I should be able to discuss whether or not the extra couple hours* worth of finishing was worth it. It was definitely easier to sew the buttons on since I didn't have to worry about the end of the thread pulling through or the stitches getting all distorted.
So there you have it. I hope this is helpful, and that everyone gets inspired to back their button bands! You know, if you've got the extra time to spare...
* To be fair, that time includes going out and getting the buttons. I'm not that slow a sewer!
No comments:
Post a Comment